Set Up Blender Addon Development Environment in Windows 10 and 11
Introduction
Screenshots in this tutorial were made with older versions of Visual Studio Code and Blender, so their appearance may be different from what you will see running the current version of these software on your machine.
Despite this, the screenshots are still relevant because the software didn't change significantly.
Why would we need something like a "development environment", you ask? Why would we bother wasting time and bogging down our computer by downloading, installing, and setting up a bunch of external software when Blender has a perfectly functional built-in text editor?
The short answer is — because that's how the pros do it! And the long answer is — because that's how the pros do it! (for the following reasons):
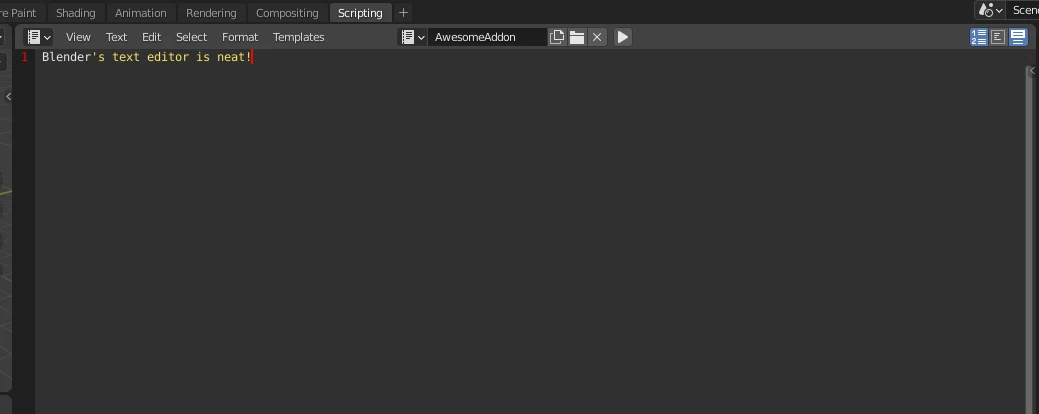
- Blender's text editor is almost as basic as text editors come with limited functionality which makes using it painful for anything but quick testing and creating simple one-file scripts.
- External code editors and integrated development environment software (IDE) provide quality-of-life features that make development quicker, easier, and much less of a pain. Some of the more important features those tools provide include: easy file management, syntax highlighting, autocomplete, reference look-up, navigation to definition, advanced search and replace functionality, debugging, version control system integration, and more. All of these features are essential for efficient workflow and we get them by using external code editors or IDEs.
Downloading Required Software
To set-up Blender addon development environment, we're going to need 3 pieces of software:
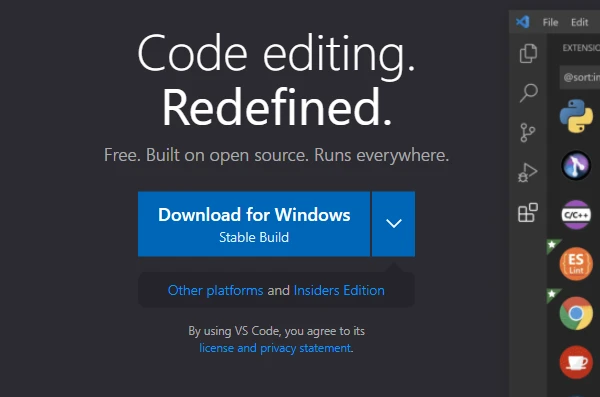
- Visual Studio Code — one of the most popular code editors on the market that also happens to be free and open-source.
- Blender — the hotshot that this tutorial is built for.
- Python — Python programming language interpreter.
Why not use PyCharm? It has better refactoring tools and is an overall better IDE than a text editor.
PyCharm has some convenient refactoring tools that Visual Studio Code either lacks or they function not as well as in PyCharm.
However, Visual Studio Code has a huge advantage over PyCharm when it comes to Blender addon development — it supports remote debugging and has a way to quickly and effortlessly reload scripts so that Blender picks up the changes. This is achieved via the Visual Studio Code addon Blender Development by Jacques Lucke. It even has an option to sync changes to Blender on Visual Studio Code file save which makes iterating code changes a breeze.
Unfortunately, debugging with PyCharm Community Edition (which is the free one) is not possible as it requires remote debugging functionality that is available only in PyCharm Professional edition.
Even if remote debugging functionality was present in the PyCharm Community edition, we would still have to implement our own version of Jacques Lucke's excellent Visual Studio Code extension.
Visual Studio Code
Go to https://code.visualstudio.com to download Visual Studio Code and install it using the default settings.
Blender
Go to https://www.blender.org/download/ to download the latest Blender version. Install it using the default settings. For this tutorial, I'm using Blender 4.2, but it should work with any Blender version from 2.80 and later.
Python
Blender comes with Python bundled-in, so technically, we installed Python when we installed Blender. However, that's only half true because as far as Windows is concerned, Python doesn't exist on our system, as it doesn't know where to look for it. To tell Windows that we have Python installed, we need to add Python executable location to Windows PATH environment variable. When installing Python via its installer, PATH variable gets edited automatically.
What is PATH environment variable?
Environment variables are globally accessible dynamic values for running programs to use.
PATH is one of those environment variables. Its purpose is to define the directory where executable programs are installed so that other programs that need to access those executables, know where to find them.
Other examples of environment variables include:
- TEMP: defines the location where programs can store their temporary files.
- windir: defines the directory where Windows is installed.
You can edit, remove, or add new variables by pressing ⊞ , searching for Edit the system environment variables , clicking it, and clicking Environment Variables in the opened window.
Blender's Python vs System Python
Before we proceed, let's pause for a minute. As already mentioned earlier, there are two ways we can go from here. We can either:
- Use Python interpreter embedded in Blender, or
- Download a separate Python interpreter and install it globally.
Everything is simple with the first option. When selecting an interpreter in Visual Studio Code, we navigate to Blender's Python bin folder, select python.exe and we're good to go.
If we go with the second option, there are some caveats regarding Python version differences between Blender's Python and global Python. Let me explain.
If you go to https://www.python.org/downloads/, you'll see that by clicking the main download button you get a certain version of Python. For me, it is Python 3.12.5. Latest versions of Blender don't always have the latest version of Python bundled-in. For example, Blender 4.2 ships with Python 3.11.13. For it to work, you would want to download Python 3.11.13 from the website and install that instead of the latest one. To make Blender use the globally installed Python instead of the bundled one, we would need to delete the bundled Python first because Blender will, by default, always favor its own Python over the global one. It can be found at C:\Program Files\Blender Foundation\Blender 4.2\4.2\python. If we don't delete it, Blender will simply use the bundled Python.
Why should the globally installed Python's version match Blender's Python version?
If you don't delete Python bundled with Blender and the versions don't match — it's no big deal. You could install the latest Python version and develop for Blender without any problems if you didn't use any features from the newer version. If you do use some of those features, Blender will throw errors and your script will not work. This is because your code editor or IDE would use the system Python, and Blender — its own.
If you do delete the bundled Python and the versions don't match, Blender will simply not run. It needs the same Python version it was compiled with. It means that the system Python version must match exactly the one that came bundled with Blender. Both major and minor versions, along with the processor architecture (32-bit or 64-bit) must match. For example, if the bundled Python version is 3.11 64-bit, you must download and install Python 3.11 64-bit version from https://www.python.org/downloads/ for Blender to work.
To keep it simple, and because I use Python for Blender development only and don't need many versions of it on my system, I don't need it installed globally. Thus, I'm going to pick option one for the rest of this tutorial.
Setting Up Visual Studio Code Extensions
We need to install two extensions:
- Open Visual Studio Code.
- Go to View > Extensions
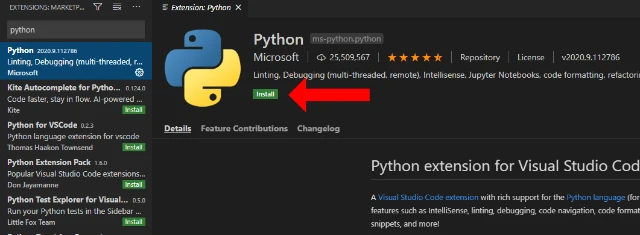
- In the extension window search bar, enter python
- Select Python extension created by Microsoft and click Install.
- Wait for the installation to finish.
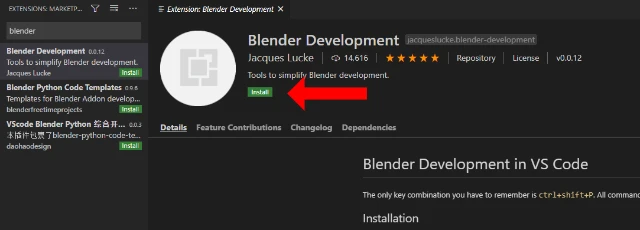
- In the search bar, enter blender
- Select Blender Development extension created by Jacques Lucke and click Install
- Wait for the installation to finish.
We're done installing extensions.
Installing Autocomplete
Before going further, let's test our set up we have so far. In Visual Studio Code:
-
Go to File > Open Folder .
-
Choose a location where you would like your project folder to reside and create a new folder there.
It is best to choose a directory outside of any Blender directory so that when deleting or upgrading Blender your addon files are not deleted as well!
-
Name it test, select it, and press Select Folder .
-
If a window pops up asking you if you trust the authors of the files in this folder, click Yes, I trust the authors .
-
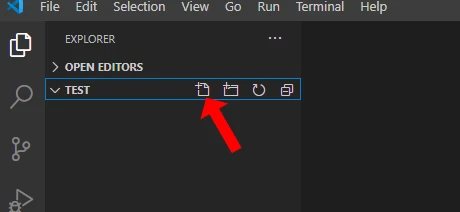
Expand the test section on the left side of the screen and click the New File icon. Name it
test.py.
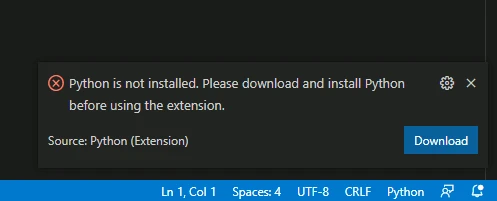
Visual Studio Code may show you a message saying that Python is not installed and prompt you to download it. As we are going to be using Python that comes with with Blender for this tutorial, ignore it for now. We will deal with it at the end of the tutorial.
For Visual Studio Code to recognize Python files, we need to show it where Python executable is located. To do that:
-
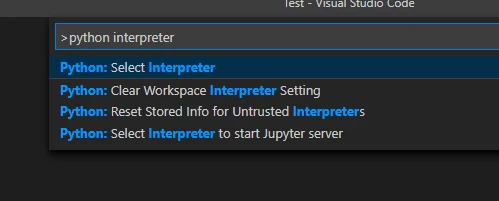
Press F1 and type python interpreter .
-
Select the Python: Select Interpreter option, then Enter Interpreter Path... , and finally Find... .
-
Go to
C:\Program Files\Blender Foundation\Blender 4.2\4.2\python\binand selectpython.exe.
Python interpreter should now load and you should see the loaded Python interpreter version in the bottom left corner of the screen.
You may receive a message saying that the interpreter you selected was invalid.
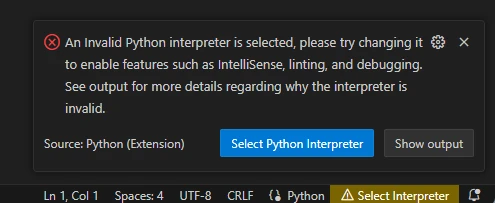
If you press Show output , you'll see a stack trace where you will find an error with code 3221225781.
This is most likely due to missing C and C++ runtime libraries. To verify, go to C:\Program Files\Blender Foundation\Blender 4.2\4.2\python\bin in your file browser and try to launch python.exe to make sure that it launches without any errors. There may be an error shown that VCRuntime140.dll is missing. In this case, you will need to download and install the Microsoft Visual C++ Redistributable.
After installing Microsoft Visual C++ Redistributable, make sure to restart Visual Studio Code. You can do this by either closing the Visual Studio Code window and reopening it, or you can press F1 , type and select Developer: Reload Window . Python should now be loaded.
Python is now locked and loaded. Let's try to execute a line of Python code to check a couple of things. In the opened test.py file, type print:
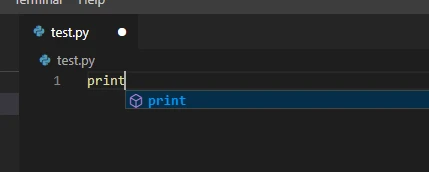
We can see a popup appear — that's autocomplete in action. Now, finish typing the command and hit the green triangle in the top right corner of the screen:
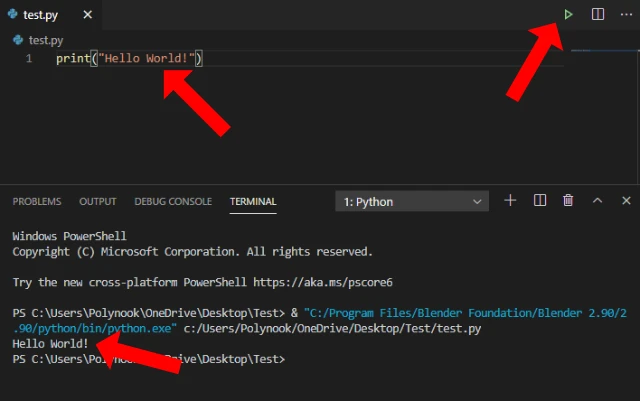
Observe the command execute in the Terminal. Everything works as it should. There is one more thing left to verify. On the next line, type:
import bpyThis command imports Blender's main python library into the test module (test.py file). Every script that interfaces with Blender by using the bpy library will need to have this line. In the next line below, type:
bpy.A popup should appear in the same way it did earlier, but it doesn't:
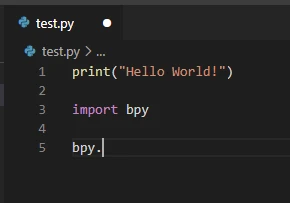
In order for it to appear, we need to install Blender Python API library. We do this by installing fake-bpy-module using Python's PIP package manager that comes installed with Blender's Python. Type the following command in the open Visual Studio Code terminal window:
& "C:\Program Files\Blender Foundation\Blender 4.2\4.2\python\bin\python.exe" --% -m pip install fake-bpy-module-4.2 --user
in the terminal and press Enter . Wait a minute for it to download and finish installing. Once it says in the terminal that the module was successfully installed, restart Visual Studio Code or reload window by running the Developer: Reload Window command.
Now, try typing bpy. again and give it a moment to load. You should see something like this:
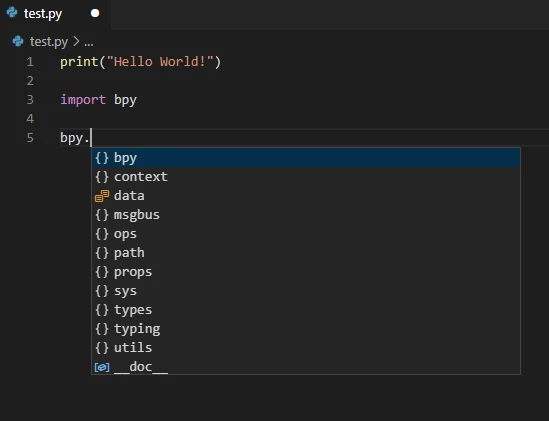
Blender autocomplete is working.
Setting Up Linting
You may have noticed a prompt in the bottom right corner of the screen complaining that Linter pylint is not installed.
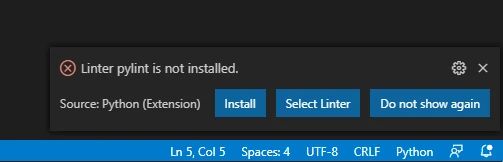
A linter is a program that checks your code for syntax and style errors and highlights them. They are useful because not only do they save time by marking errors so you can spot them easier, they also hint at potentially bad coding practices that you should take a moment to address.
Replace code:
import bpy bpy.
prit("Bye World!") 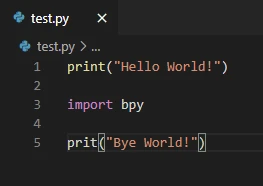
Notice how we have misspelled the print() command and Visual Studio Code does not indicate this as an error. Let's install a linter and see what changes.
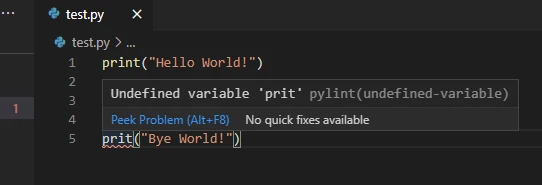
There are several different linters available. We will install pylint for now. If you don't see the “Linter is not installed” prompt, press F1, type linter, and select Python: Select Linter > pylint. Press Install. Wait until it finishes installing, save the file by pressing Ctrl + S. You should see a wiggly line under the erroneous command and if you hover your mouse cursor over it, a popup will appear with hints to what may be wrong.
By default, linting happens when you save the file. It doesn't run live as you type due to performance reasons. If you wish to have live-linting, there is a workaround for this. We will have to enable autosave by going to File > Auto Save. With this option enabled, Visual Studio Code will automatically save changes made to a file with a delay of 1 second. Every time a save is made — linter runs.
There are several other linters available. The main difference between them is how strict they are in detecting “malpractices.” You can install them and switch between them the same way we installed pylint. Feel free to experiment and Google around about their differences if you please as it's mostly personal preference which one you choose to use.
Updating Scripts in Blender
If you have Visual Studio Code running, close it and open it with Administrator rights. Administrator rights will be necessary for Visual Studio to install Python Debugging libraries. Press RMB on Visual Studio Code icon and press Run as administrator .
Once you have opened Visual Studio Code with administrator rights, we'll build a simple Blender addon for demonstration purposes. First, rename the test.py file to __init__.py (note: there are two underscores on each side of the word “init”) and then replace all the content with the following:
import bpy

bl_info = {
"name": "Test Addon",
"description": "Addon for testing",
"author": "Tester",
"blender": (2, 80, 0),
"version": (1, 0, 0),
"category": "Test",
"location": "View3D > UI > Unity Batch FBX Export",
}

class TESTADDON_PT_TestPanel(bpy.types.Panel):
bl_idname = "TESTADDON_PT_TestPanel"
bl_label = "Test Addon"
bl_space_type = 'VIEW_3D'
bl_region_type = 'UI'
bl_category = "Test Addon"
bl_context = "objectmode"

    def draw(self, context):

        layout = self.layout

        row = layout.row()
        row.label(text="How cool is this!")

def register():
bpy.utils.register_class(TESTADDON_PT_TestPanel)

def unregister():
bpy.utils.unregister_class(TESTADDON_PT_TestPanel)

if **name** == "**main**":
register()
This code will make a panel appear in the properties panel in Blender. To run this code, press F1 , type Blender Start , choose Blender: Start > Choose a new Blender executable , go to C:\Program Files\Blender Foundation\Blender 4.2 and select blender.exe. Give Blender some time to boot as this is the time where Python debugging libraries are being downloaded from the internet and installed with administrator rights (this is needed only once). After some time, Blender will boot. If you press N in 3D Viewport, a properties panel will pop up and among the tabs there we can see our Test Addon and Dev tab:
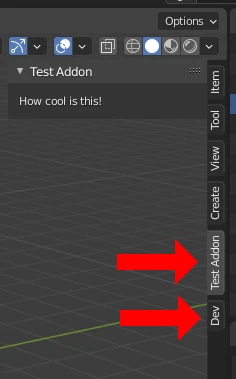
Dev tab is an indication that Blender is connected to Visual Studio Code and all the changes are ready to be synced across. Test Addon is our addon. The last part remaining is to make some changes and witness them appear in Blender.
Open Visual Studio Code and after the 26th line add the following:
row = layout.row() row.label(text="Mighty cool!")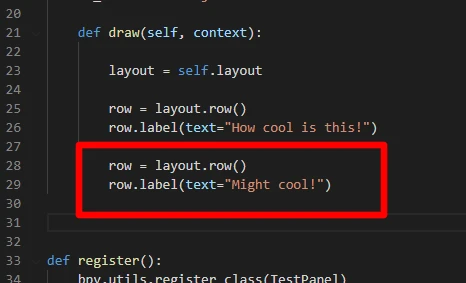
Save the files, press F1 , type reload addons in the search bar, select Blender: Reload Addons . Switch to Blender and you will see Test Addon updated with the new text.
Every time you make a change in Visual Studio Code, all you need to do to update the addon in Blender is to press F1 and then Blender: Reload Addons .
Updating Scripts in Blender with Ctrl + S
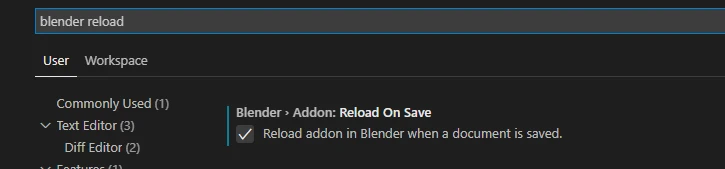
Visual Studio Code Blender Development addon has a neat feature to execute Blender: Reload Addons command when you save a file by hitting Ctrl + S . To enable it, go to File > Preferences > Settings , type blender reload in the search bar and tick the Reload On Save option.
Dealing with the “Python is not installed” Popup
Because we haven't installed Python globally, every time you launch Visual Studio Code, a message will pop up in the lower right corner of the screen telling you that “Python is not installed.” If the message is too annoying for you, there are two ways to get rid of the message:
- Add the Blender Python's directory to the Visual Studio Code settings.
- Add Blender Python's directory to Windows PATH variable.
Adding Python to Visual Studio Code Settings
- Open Visual Studio Code settings and enter Default interpreter path in the search bar
- Scroll down a bit until you see the Default Interpreter Path setting
- In the Default Interpreter Path setting field, enter the path to the Blender Python's bin directory which is: C:\Program Files\Blender Foundation\Blender 4.2\4.2\python\bin
Adding Python to Windows PATH Variable
- Press ⊞
- Search for Edit the system environment variables and click it
- Click Environment Variables in the opened window.
In the System variables section:
- Select Path system variable and click Edit
- Click New
- Enter C:\Program Files\Blender Foundation\Blender 4.2\4.2\python\bin
- Replace the Blender version number with the version of the Blender you're using
- Click OK to close the opened windows
Now, every time you open Visual Studio code, it will know where to find Python and the warning message will not be shown.
Upgrading to New Blender Version
Upgrading your development environment to a different Blender version is not without its hiccups. Here we will dissect the whole process and how to deal with problems should they arise.
Blender steps:
- First, download and install the desired Blender version.
- Launch the newly installed Blender
- Load settings from previous version or set up as new.
- Close Blender
Visual Studio Code steps:
- Open Visual Studio Code with administrator rights. Administrator rights are necessary for the Blender Development extensions to install debug tools.
- Press Ctrl + Shift + P and select Python: Select Interpreter > Enter Interpreter Path > Find . Navigate towards the interpreter which is in
C:\Program Files\Blender Foundation\Blender 4.2\4.2\python\bindirectory. - Press Ctrl + Shift + P again but this time select Blender: Start > Choose a new Blender executable . Navigate to the new executable, which is in
C:\Program Files\Blender Foundation\Blender 4.2directory. - Wait until Blender boots up.
You may encounter the following error when launching Blender from Visual Studio Code:
File "c:\Users\YourUserNameHere\.vscode\extensions\jacqueslucke.blender-development-0.0.16\pythonFiles\include\blender_vscode\load_addons.py", line 42, in create_link_in_user_addon_directory
os.remove(link_path)
PermissionError: [WinError 5] Access is denied
As the last step of the setup, Blender Development extension tries to create a symbolic link to your addon inside the %USERPROFILE%\AppData\Roaming\Blender Foundation\Blender\4.2\scripts\addons directory. The error above indicates that the creation of a symbolic link has failed. It can fail when a directory already contains files with the same name.
When you installed the new version of Blender and opened it up, you were greeted with the choice of either loading the settings from previous Blender version or setting it up as new. Loading the settings from previous version also loads all the addons as well, including the symbolically linked ones. This results in the name conflict and in turn in the witnessed error.
To fix this, navigate to %USERPROFILE%\AppData\Roaming\Blender Foundation\Blender\4.2\scripts\addons and delete your addon files so that the Blender Development extension can symbolically link them.
Conclusion
We have everything set up to start working on our addon! Let me know what addon you wish to create by filling out the form bellow.